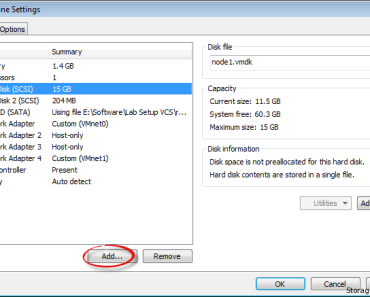
Adding and removing disks in any operating system environment is daily task of any system admin. Removing a disk from physical servers is a little more easy as compared to Virtual server containing large number of disks. In this tutorial we will try to make it easier and will explain how you can find corresponding VMDK in Linux/Unix system in VMware workstation.
Sometimes, there may be situation when you have large number of hard disk having same size added to your virtual server and you want to remove one of the disk from there. Generally the disk naming convention is as below. but some times it change also because of disk removal from between.
SCSI(0:0) -> /dev/sda
SCSI(0:1) -> /dev/sdb
SCSI(0:2) -> /dev/sdc
As the disk are of same size, so knowing correct VMDK disk in virtual server is very important because if a wrong disk is removed from the server then there could be a very big outage in the environment.
Finding Correct Corresponding VMDK in Linux/UNIX
To find correct corresponding disk against your device in UNIX/Linux server, you can follow below steps.
1. First we need to find SCSI controller number and target number from server side. This can be achieved with the help of “ls” command or “lsscsi” command. Both the commands shows SCSI controller number and target number.
Command:
# ls -l /sys/block/sd*
or
# lsscsi
Suppose we have to remove /dev/sdd disk from the server, so we will use the above command to know the SCSI controller number / bus number and target number. 2 in the below screenshot is the SCSI number and 3 is the target number. These 2 numbers are only seen if we check setting of our virtual machine from the Vcenter.
In the above screenshots, you can easily see that “lsscsi” is more neat command and the output is easily readable as compared to finding details with “ls” command.
2. Now, after checking details from server end, go to VMware vsphere or workstation and open server settings and go to hard disk advance setting.
There you will see the SCSI controller number and target number given in “SCSI-controller-no.:Target-no.” format. Check below screenshot for reference.
Now here you will see that SCSI controller number is zero, but at server side it was showing 2. We have found that, this SCSI controller number generally starts from 2 and starting number 0 and 1 are reserved for other devices.
Following above situation, suppose if you have to remove SCSI controller 1 disk, it may have a number starting from 3 at server side, so don’t get confused.
Now, as you have identified the correct VMDK disk, now you can remove the one you wanted. We will recommend to double check the disk ID’s before removing it. If you have any issue don’t forget to leave your comments and we will be happy to help.


Very useful commands. Thanks!
Thanks for appreciation Japinator. Keep visiting our website.